Showing posts with label Tutorial. Show all posts

Wednesday, January 18, 2012

Making Homemade Butter


I was looking through the net looking for an inspiration and looking for ways to make my own oils without spending a fortune on just buying them.
I was about to shut my lappy off when I suddenly had an idea about making my own nut oils.
In Google, I saw lots of articles about Nutty Butters...
Butter?

It took me awhile to figure that out...
Until I started reading.
And then comes the palm slap!
YES... Now I get it!
We have PEANUT butter in stores to spread on our bread, so walnut, almond, cashew, pistachio etc can also be made into Nutty Butters just like Peanut Butters! Only it's a whole lot healthier and yummier because you can custom whatever to suit it to your own taste buds.
I made to batches.
One for Us to eat - Almond + Sunflower Seeds + Pumpkin Seeds
and One for getting Almond Oil out of

Here's the SIMPLE RECIPE on how to make your own Butter for Consumption:
I promise, This Will be Easy!


Ingredients:
Almonds - I used about 200gms of Whole Unroasted Raw Almonds
Coconut Oil / Olive Oil - I used Coconut Oil because I prefer the smell and taste of coconut oil to olive oil. I find that Olive oil has this really strong Olive smell. 
Honey**
Salt**
Cinnamon**
Ground Nutmeg**

** are optional ingredients you might want to add in. I like to leave mine without the additional stuff so that I can experiment with different flavours when I spread them on my bread, or when I use them in cereals or making cookies / cakes

Tools:
A blender
A spoon to scoop out the Almond Butter
A clean and dry container for storing your Almond Butter

Method:
1. Place Almonds into the blender and blend them slowly at first using the impulse button and slowly increasing the speed.
2. Add a little bit of the oil of your choice and continue blending. The Almonds should start balling up inside. Use a wooden spoon to push the sides and even up on the insides but make sure the blender is turned off when you do this!! I say this because I know some people who actually does this while the machine is on!
3. You may want to add more oil if you find that the Almond is taking some time to actually become a creamy paste. Add a little bit at a time. You can try using a teaspoon at a time. Give it some time to blend. I think it took me about 15 minutes to blend. 
4. You now officially have your very own Pure Almond Butter!
5. Add in a pinch of salt / to taste, honey, cinnamon or nutmeg or whatever it is you are crazy about, mix them up and transfer them into a container for you to store your butter!
6. Store them in a nice cool place. I store mine in my refrigerator. Since Coconut oil does not harden up like a rock, it's actually quite easy to scoop out with a butter knife and spread it on toasted bread.
7. Serve them to any nut crazy kid/adult and watch them enjoy it :)


Chago loves his :)
I actually used Pumpkin and sunflower seed along with Almonds as mentioned above. It tastes more or less just like pure almond to me except the colour has a hint of green to it from the pumpkin seed.


This is Pure Hazelnut Butter which I made for the purpose of extracting its oil from.
The method of doing this is the same way as mentioned above. Just omit the extra stuff out.
I used Olive Oil for this.
I store this under room temperature.
Wait for 2 weeks and Hazelnut Oil will appear on the surface of the Almond meat!
Just get those oil and you'll have the oil you would need.
What can you use it for?

1. Add them into handmade lotions, soaps, shampoos and
Heck!
Why not?? Into commercial Lotions too!
2. Rub the oils directly on your skin. They will not feel oily or sticky on your skin. Use it as a serum for your face and your hair. Rub them on the rough and dry areas on your body i.e. Elbows, heels of your soles, knees, in between your toes and fingers, palms etc!

What to do with the meat?
Rub them on your face, or use them as a facial mask.
You can also use cheese cloth to squeeze all the oils out and use the meat in your soaps as an exfoliating agent.

Hope you find this useful :)
I love making homemade edibles for Chago and the adults :)
Great ideas for gifts too don't you think so?


Saturday, December 3, 2011

Power Breakfast and anchovies for lunch and dinner please!

I have religiously been doing this for chago and Miguel (of course) ever since Chago started on Solids full time upon turning one last July. 
I never actually blogged about it...
But I get lots of mails from some others asking me about the home made dishes Miguel and I 
would prepare for chago.
So here is me sharing what I prepare in jars to add into Chago's breakfast...

Pumpkin seeds (not the salted Kuaci but the unsalted ones where you can find packaged in an airtight pack)
Sunflower seeds - again unsalted and unsweetened and organic unsalted almonds.

Mix them all together,
ground them up in a blender... I make them a little chunky and not too fine :)
and then store into a jar.


Anchovies - Yummy!
I use anchovies for Chago not only for the nutritional values they carry but also as a natural substitute to salt since we have not once use salt in any of his home cooked food.

Wash the anchovies, I do this around 3 to 4 times,
strain and leave on a strainer for an hour.
Spread the anchovies evenly on a baking tray,
pop it into the oven under low heat and let it bake till it looks dried up - but not to the extend where it goes brown and crunchy! It's delicious that way I know but what we want here is the nutrition it carries :)
Let it cool and then blend the anchovies a little bit at a time


Will post more on what the breakfast looks like tomorrow :)

Tuesday, August 9, 2011

DIY Baby Safe Paint and Messy Messy Day!

I have been thinking about this for the past couple of days. Looking at Chago sit on his bed building blocks with his papa, but his papa was hogging the blocks. So I got Chago to the kitchen, let him go walking round and round while I prepare his baby paint :)

Recipe for a Baby Safe Paint:

Flour
Cold water
Safe Food Colouring (don't get the cheap ones - look at ingredients)
Hot water 

1. Pour some flour into a bowl
2. Add cold water (not too much)
3. Mix the flour and water to create a paste
4. Add your desired colouring
5. Mix and add hot water to adjust the consistency of the paste (to dilute it a little) 
DONE

Do that for other desired colours and you'll have one laughing baby messing up the kitchen floor.

Warning!
Change clothes to darker colours or remove clothes!
I forgot to do so but i don't really care since those were just home clothes :)


Till we paint next :)

Saturday, July 16, 2011

Baby You can drive my Car, Coz Baby I love you!


Chago has been so interested in cars lately, going vrrroooom vroooom VROOOOm whenever he sees a car, or anything with wheels! We have also given him our old school toy cars from the 80's to play with. And he just loves them, he also knows how to pull the toy car back and let it go for it to move forward... well, okay, it may actually be a fluke. But he seems to be doing without knowing it. 

Anyways, I decided to make him a wheel so he can go vrrooom vrooom vrooom in the car or in the living room or in my sewing room with a steering wheel in his hands. 

Here's a pictorial tutorial IF you'd like to make one for your little ones too.


I found some good cardboard boxes at home. 


Using something round around the house, trace it to the cardboard and draw the Y in the middle like how a real steering wheel would look like


Oh, and if your little one is with you, keep him busy.


Cut it out


Here, I have Felt in brown and red, some polyester filling sheet like you would use in a comforter and a very thin fabric about 10" x 10" (depending on the size of your steering wheel)


1st: I lined the brown felt under, and then the filling, the mold...


And then the thin Fabric


Pin them in place so they won't move about when sewing


Starting on the outer part of the wheel, use a straight stitch to sew around.


Then on the inside, go slow on this... you don't want your needle to get caught in the cardboard. You should be able to see through the fabric. 


This is how it looked like all sewed down.


This is how it looked like on the brown felt side


Cut the extra unwanted pieces out


Now place it on top of the red felt. You can actually use another sheet of polyester filling, I wanted to do that but I forgot all about the other piece.


Use a tight zig zag stitch around it, and on the insides too


And you'll have this


Again, Cut out the unwanted parts


And Tada!!! A... very unrealistic steering wheel but...


I found this... Which belonged to one of my youngest sister's Interactive Disney game books..


Apply hot glue on the back


And stick it on. Hey it even works, a little weak on the battery though...


Now, let's see what he thinks about it...


Still Checking it out...


Getting in the "car"


And off he goes!

Vroooom Vroooom VROOOOM

:)

Till I sew next :)

Friday, May 6, 2011

Recycled Scraps into Baby Arm Chair Tutorial


I was looking at my working space thinking I really needed to clean up. Problem with me is I’m a huge hoarder when it comes to rubbish at most times. This frustrates Miguel so much. Said I was so unorganized and messy, which I never denied...

So I decided to clean up and say goodbye to all the scraps that has grown more and more each time I sew (which is, everyday). But as I scooped up those too small to make anything remnants, a heavy feeling sank deep in my guts. I wasn’t ready to part, only because I know there was some way to reuse them. And then, just like the speed of Gordan Flash, I got an Idea…

I started getting Santiago to eat finger food all by himself last week and earlier today, while eating his chopped pears + Cheddar Cheese + Raisins, I thought to myself  “wouldn’t it be nice if he had his own mini arm chair to sink into while snacking on his food…”

That was my inspiration for this project J I said tutorial in the title of this post which is not 100% detailed tutorial, but more of a snap as you create sort of thing. So I’m really sorry if you were expecting some kind of fancy tutorial. It’s usually too late for me to create one when I’m in the middle of an idea. I don’t take measurements; I just go with the flow… So please forgive me.


Freestyle tutorial steps to make a baby armchair 


 1. Cut 3 rectangles of your desired size. This is for the arm of the chair and for the back for more support.


2.       Fold each of them into halves and sew.


      3. Using a needle, hand sew one end of each sewed-up rectangles to gather them up and close it.


 What you’ll have are three bolster like casing.


4.       Stuff them with your fabric scraps… This will make them heavy so stuff them real good!
Don’t forget to say “Hasta la vista bebe!” Hand sew the ends to close the opening.


Lookie what I found! A worn out chair cover / mat... We usually put it on the wooden chairs to cushion our tushies!


And this! I made this as a back-up for Santiago's stroller but I never got around to using it


5. Assembling!
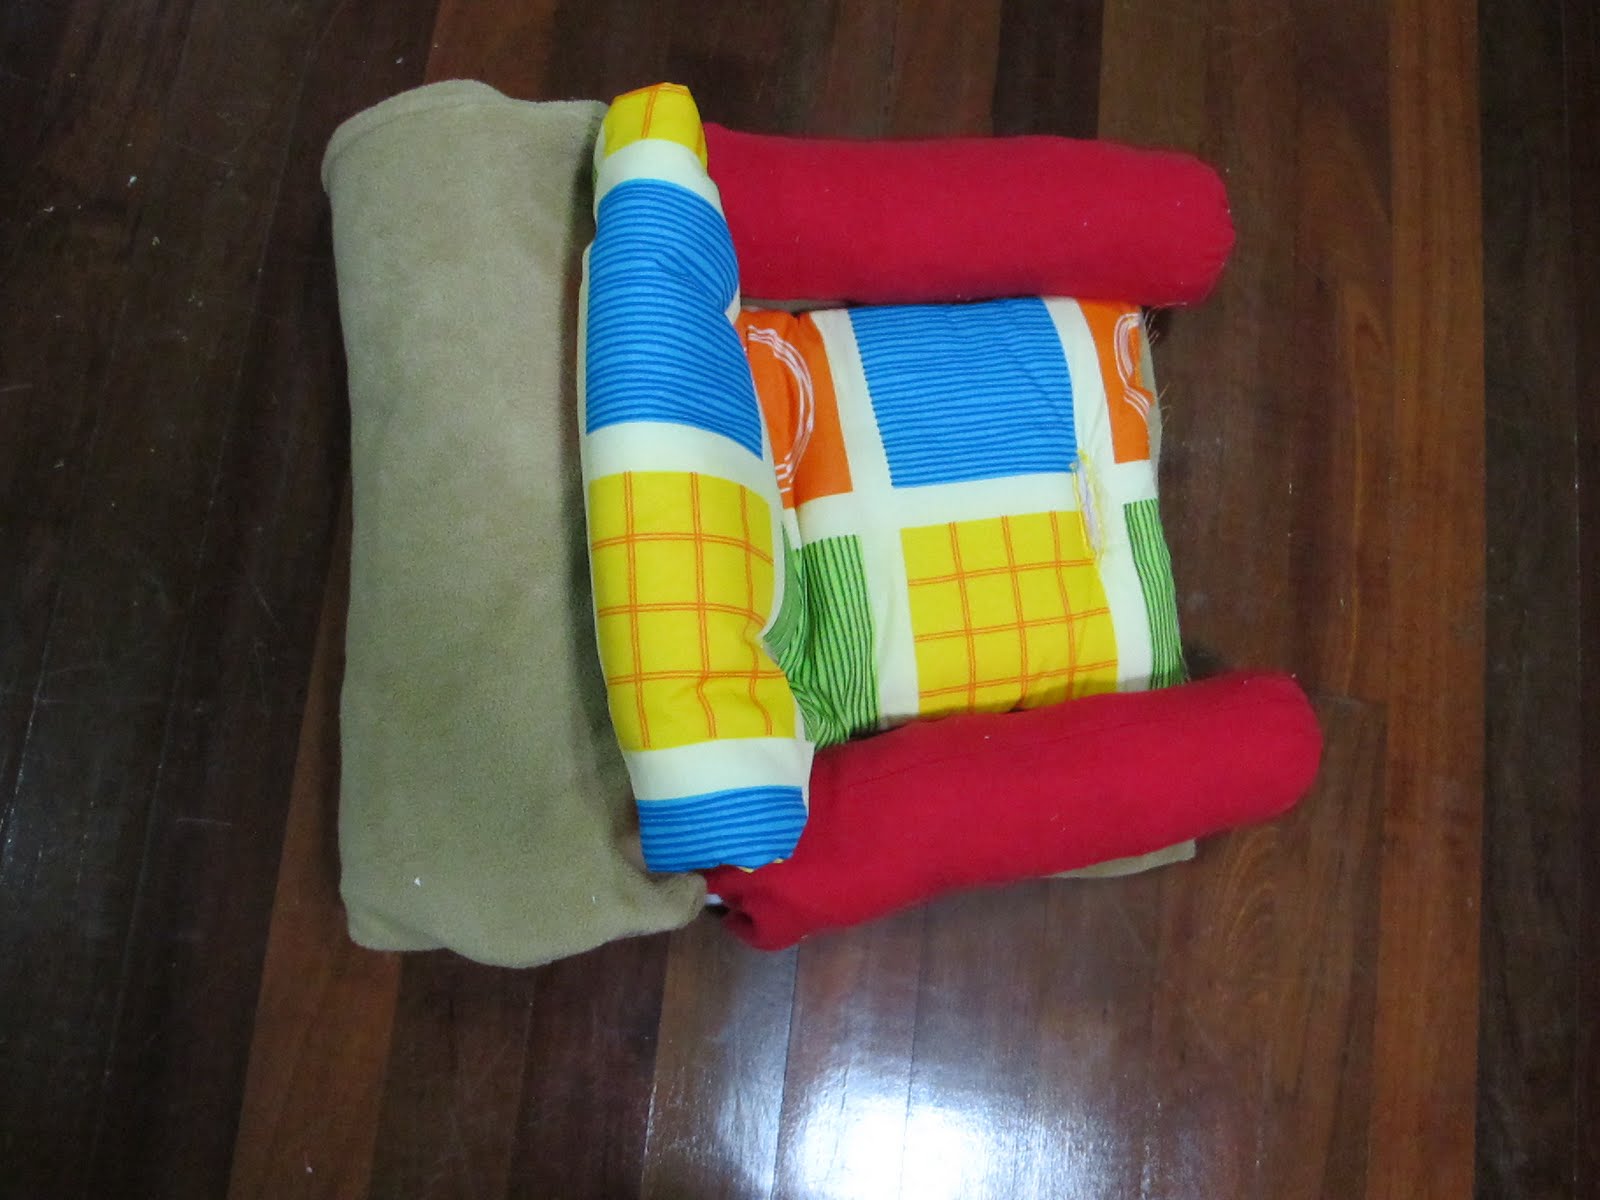
I placed 2 bolster on the sides and one on the back for support... This was just me assembling it and seeing if it looks alright.


This is what it should more or less look like. I placed the worn out chair mat under by folding into half. The stroller thinggy was positioned in a way that it would sit with it's top folded backwards.


This is not scrap but I didn't like how the worn out chair mat looked like and loved this Coral Fleece I had that never got used as a blanket before.

So... 6. I placed my worn out mat onto the blankie and cut it like shown


Once you get to the end, I just fold the fabric over and cut

7. Sew the long sides of the blankie together


What you'll get is a case for...


The worn out mat. Sew to close the opening.


This is what it more or less looks like now with the blankie sewn over. 


Ribbons! My mum bought this 9 years ago. NINE YEARS! and never actually used them. 


8. I slipped in the ribbons through that slit I made before for the straps of the stroller and tied it at the back. This will keep the back of the chair together when Santiago wants to lean in. 


9. More ribbons! I tied a knot around one bolster...


Slipped it under the Stroller cushie to meet the other bolster...


Tie a knot around that one too...


Slipped the ribbon under the chair...


To meet the first knot and make another knot.


And then I tied a ribbon from one bolster to another to give it more "hold" 


And there you have it. A simple tie up, recycled fabric scraps into a mini armchair. You can actually release the back to roll out into a sleeping position if he's drinking milk and needs to be on his back or if he just wants to sleep. Will try this on him tomorrow when he's snacking.

It's 3:30am now, and I should really be sleeping :p

Till I sew Next